
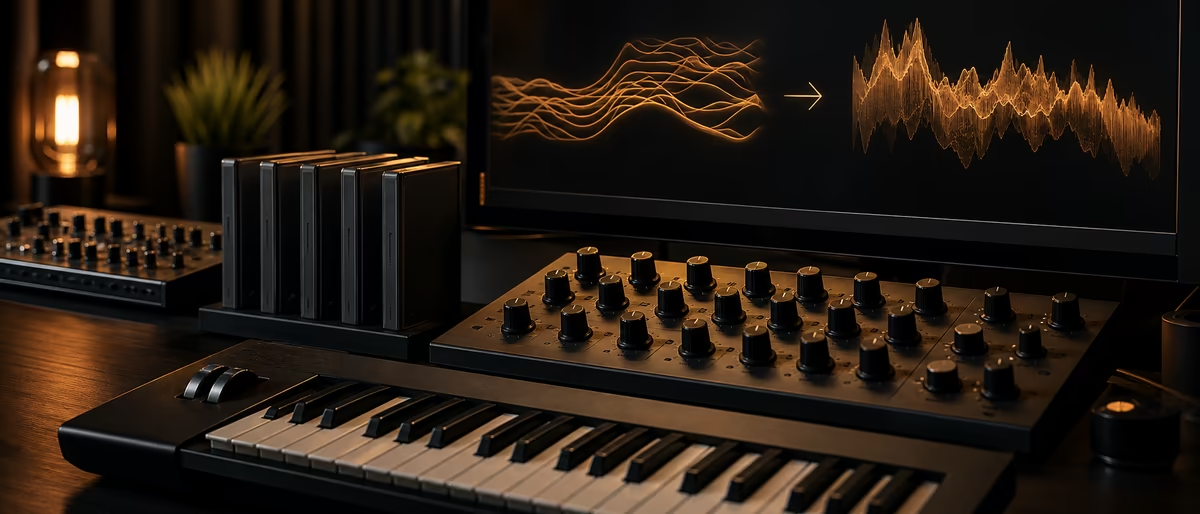
Serum preset design
Respuesta rápida
Design Serum presets from Init: pick a wavetable on OSC A, set WT Pos and warp, shape with filter and Env 1, then add LFO motion. Finish in FX and the Matrix, save into Presets/User, and study free banks in best free Serum presets.
What a Serum Preset Actually Is
A Serum preset is a saved state of the whole instrument — oscillators, filter, modulation, macros, and the FX chain — not a bounced sample. It is a synthesis recipe the plugin rebuilds on load[1].
Xfer designed Serum as a visual wavetable synth with high-quality playback and deep wavetable edit/morph tools. Serum 2 keeps that core and adds oscillator types (wavetable, multisample, sample, granular, spectral) plus flexible routing, as a free upgrade for Serum 1 owners[2].
This guide uses one loop on both versions: Init → oscillators → filter → modulation → FX → name and save. Menus differ slightly; the method does not. Confirm the live presets path with Menu → Show Serum Presets Folder[3].
- OSC tab Wavetable (or other) oscillators, Sub, Noise, main filter, envelopes, LFOs, macros — the core of the patch[4].
- FX tab Reorderable built-in processors (distortion, delay, reverb, hyper/dimension, and more) that live inside the preset[4].
- MATRIX tab Full list of modulation source → destination assignments, depths, curves, and aux scaling[4].
- GLOBAL tab Quality, voicing-related options, chaos, and other deep settings that still save with the patch[5].
Init Patch Workflow: Design From a Clean Slate
Do not design a bank by nudging a factory lead until it “kind of” works. Load Init so every parameter starts known. On default Init, OSC A typically loads a basic saw-style wavetable and OSC B is off[5].
Xfer’s getting-started guide suggests learning from presets, then experimenting with wavetables and FX[4]. The pro habit is hybrid: reverse-engineer a finished patch for vocabulary, then rebuild from Init so you own every routing.
- Load Init and set a reference note
Open Serum on a MIDI track, load Init, play a single mid-range note (C3–C4). Keep master volume sensible so filter drive and FX later do not clip the channel. - Define the role of the patch
Write the role first: mono bass, poly pad, pluck, lead, riser, or FX. Role decides unison, Env 1 shape, filter slope, and whether Sub/Noise are even allowed. - Lock pitch and voicing early
Set octave, fine, and unison (if any) before you chase fancy warps. Unison detune on a bass can destroy mono low end; keep mono sources tight until the midrange is intentional. - One oscillator first
Design a usable tone with OSC A alone before enabling OSC B. Complexity without a clear fundamental is noise, not a preset. - Modulate last, not first
Get a static tone you would actually use, then add Env 2 / LFO movement. If the unmodulated patch is weak, modulation only hides the problem.
Useful control habits from the Xfer community shortcuts: Shift-click for fine knob control, Ctrl-click (Win) / Cmd-click (Mac) to reset a control to default, and Alt-click to assign modulation depth without grabbing the mini dial[6]. Those three shortcuts speed up preset work more than any macro pack.
Oscillators, Wavetables, and WT Pos
Main oscillators load wavetables — stacks of single-cycle frames. WT Pos scans those frames and is the primary timbre morph on a classic Serum patch[5]. Serum 2 adds Smooth Interpolation plus expanded warp/FM/PD/distortion options before the filter[2].
Serum 2 ships with on the order of 288 wavetables and over 626 presets — enough factory material to study bank structure[2]. For shared wavetable theory, see wavetable synthesis tutorial.
OSC A / B design rules
Match wavetable family to role: analog-style for basses/supersaws, formant tables for vocal leads, noisy tables for FX. Enable OSC B only for a second spectrum, octave stack, or silent FM modulator. Master one warp mode before stacking several[5].
Lower Rand and align Phase for consistent mono attacks; raise Rand on pads and stacked leads so notes do not phase-lock identically[5].
Sub and Noise oscillators
The Sub oscillator is a simple wave for low-end weight. Use Direct Out to bypass filter coloring under a filtered mid[5]. Deeper bass workflow: how to design bass in Serum.
The Noise oscillator uses samples (not only white noise) for attacks, air, and textures. One-shot stops looping; keyboard tracking makes tonal noise follow pitch[5].
| Source | Primary job in a preset | Common WT Pos / level move | Watch out for |
|---|---|---|---|
| OSC A | Core tone / fundamental character | Slow LFO or Env on WT Pos for motion | Harsh tables need filter before FX |
| OSC B | Layer, octave, or FM modulator | Detune slightly or mute level for pure FM | Double-unison mud if both oscs supersaw |
| Sub | Mono low-end weight | Level match to OSC A; Direct Out for pure sub | Phase fights with OSC A at same octave |
| Noise | Attack, air, texture | Env 2 on level for pluck noise | Looping hiss on sustained patches |
Filters and Amplitude Envelopes
Filters are the main shaping stage after oscillators[4]. The OSC-page filter is visual and full-featured; a second filter sits in the FX chain for post-effect filtering[5].
Start with a normal low-pass. Multi, comb, and misc types come after the base tone is solid. Use keytracking on leads/mono basses; Drive/Fat add color but raise gain — check levels after each change[5].
- Env 1 → amp Envelope 1 is hard-wired to overall amplitude. Shape Attack/Decay/Sustain/Hold/Release here first so the patch’s note length matches the role (pluck vs pad)[5].
- Env 2 → filter cutoff Classic subtractive move: short attack, medium decay, low sustain for plucks; slower attack for pads. Drag Env 2 onto Cutoff and set depth with the blue ring or Alt-click depth assign[6].
- Env 3 → secondary targets Reserve Env 3 for WT Pos, warp amount, or FX send-like parameters so filter and amp envelopes stay independent.
If the filter opens wide and the patch still feels thin, fix the oscillator choice — not more resonance. Resonance on a weak spectrum only emphasizes emptiness. For broader synthesis context beyond Serum, see sound design tutorial: synthesis types.
FX Rack: Finish the Preset Inside Serum
The FX tab is part of the preset. Modules include hyper/dimension, distortion, flanger, phaser, chorus, compressor, delay, reverb, filter, and EQ — enable only what you need and reorder freely[5][4].
Bank-friendly order: distortion for harmonics → delay/reverb for space → hyper/chorus for width → EQ last. Keep mono basses dry and narrow; reserve long reverb for pads, FX, and lead tails.
| Patch role | FX priority | Usually skip | Save tip |
|---|---|---|---|
| Mono bass / 808-style | Light distortion → compressor → high-cut EQ | Wide hyper, long reverb | Suffix _Mono in the name |
| Poly pad | Chorus/hyper → long reverb → gentle EQ | Hard clip distortion | Longer Env 1 release; lower peak level |
| Pluck / arp | Short delay → small reverb → optional phaser | Heavy dimension on every note | Tight Env 1; noise one-shot for attack |
| Lead | Mild drive → tempo delay → short plate | Full-wet reverb | Macro 1 = filter + delay mix |
| Riser / FX | Phaser/flanger → long reverb → filter sweep | Nothing — go wide | Document BPM-synced LFO rates in name |
Anything the end user must hear out of the box belongs in the preset FX tab, not only on the DAW channel[5].
Modulation Matrix Basics (Movement Without Chaos)
Modulation turns a static Init into a living preset. Drag an LFO, envelope, velocity, mod wheel, or macro onto a target; depth shows as a ring[5]. The Matrix tab lists every assignment so you can audit depth, curve, polarity, invert, and aux sources[4].
LFO modes that matter for presets
LFO shapes can be drawn or loaded; rate free-runs or locks to BPM. Use note-trigger for consistent plucks, free-run for pads, and one-shot LFO curves when ADSR is not enough[5].
Macros as the user-facing controls
Ship 2–4 macros: brightness (filter + WT Pos), movement (LFO depth), space (reverb/delay), drive or width. One macro in the DAW beats ten buried LFOs[5]. Use an aux source to fade LFO depth so motion is performable, not always-on.
- Assign the first motion source
Drag LFO 1 onto WT Pos or filter cutoff. Set a musical rate (1/4 or 1/8 if BPM-synced). Keep depth modest until the static tone still works at depth = 0. - Open Matrix and clean polarity
Check unipolar vs bipolar. Filter openers are usually unipolar from a closed baseline; vibrato-style pitch mods are bipolar[6]. - Add one aux control
Route Macro 2 as aux on the LFO→cutoff row so the user can dial motion without editing the Matrix. - Stress-test polyphony
Play chords and wide intervals. If stereo chaos or CPU spikes appear, reduce unison, FX, or LFO count before saving the bank version.
Naming, Saving, and Building Clean Banks
Saves go under Presets/User by default; factory banks stay in category folders[1]. Serum indexes one folder level under Presets — use Presets/User/MyBankName, not deep nests the browser ignores[1].
Import/install any pack: Menu → Show Serum Presets Folder → place files in a folder inside Presets → Menu → Rescan folders on disk[3].
- Name format Use
Role_Descriptor_Key— e.g.Bass_Reese_Dark_A,Lead_Supersaw_Wide_C. Put genre last if needed so alpha sorting still groups by role. - Version suffix Add
_v2when you revise a public bank so users can keep both. Never silently overwrite a shipped name with different routing. - Custom tables & noises User wavetables and noise samples must live under the Serum Presets tree (Tables / Noises) or travel with the patch correctly — factory tables should not be overwritten[1].
- Serum 1 vs Serum 2 packs Serum 2 maintains its own presets folder family; treat S1
.fxpbanks and S2 content as separate products when you publish[2].
Before zipping a bank: no clipping at Init-level gain, consistent macro jobs, mono patches stay mono-safe, and BPM-synced LFOs are intentional. Study free packs in best free Serum presets, then rebuild three favorites from Init.
Practice Recipe: One Patch You Can Finish Today
Use this as a complete Init-to-save drill. It intentionally stays generic so you can re-skin it for trap, house, or DnB later.
- Init + OSC A
Load Init. Choose a mid-bright analog or digital wavetable on OSC A. Set unison 0–2 for a lead, 0 for a bass. Play C3. - WT Pos static sweet spot
Find a WT Pos that has body and some upper harmonics. Leave one hand on that value — that is your default macro-zero position. - Filter + Env
Low-pass, cut until muddy, then open until usable. Env 1: short attack, medium decay, low-mid sustain for a plucky lead. Env 2 → cutoff with positive depth. - One motion source
LFO 1 → WT Pos, slow rate, small depth. Macro 1 → filter cutoff. Macro 2 aux-scales LFO depth in the Matrix. - FX + save
Light distortion, tempo delay at low mix, short reverb. Save asLead_Practice_Morph_AunderPresets/User/Practice, then Rescan if the folder is new[3].
When this is muscle memory, compare with Vital synthesizer tutorial and study free Serum banks beside your own saves. Xfer’s preset store shows commercial naming and role coverage[7]. More free tools: software on Plugg Supply.
Grab free verified Serum banks and synth tools on Plugg Supply, then reverse-engineer them from Init using this workflow.
Learning path
Answer hubs relacionados
Materiales del catálogo
Materiales de producción para probar después
Packs, stems y recursos de sonido relevantes del catálogo para pasar de la guía a la producción de inmediato.
![Sound Designs Tutorials Aggression for Serum [Synth Presets]](/images/posts/sound-designs-tutorials-aggression-for-serum-85003.avif?v=2026080101)
![Lux Cache SERUM 2 SOUND DESIGN STUDIES Part 1 Exploring Potential In the Spectral Oscillator with Kai Whiston [Synth Presets]](/images/posts/lux-cache-serum-2-sound-design-studies-part-1-exploring-pote-73992.avif?v=2026080101)
![Anarkick Sound Design Anarkick Serum Stash Vol II [Synth Presets]](/images/posts/anarkick-sound-design-anarkick-serum-stash-vol-ii-44826.avif?v=2026080101)
![Dark Silence Sound Design Dark Silence: Festival Season For Serum [Synth Presets, WAV]](/images/posts/dark-silence-sound-design-dark-silence-festival-season-for-s-1236.avif?v=2026080101)
Artículos relacionados
![Kuren Music Dubnation Vol.2 UK Garage (Complete The Bundle) [WAV, Synth Presets]](/images/posts/kuren-music-dubnation-vol2-uk-garage-complete-the-bundle-85823.avif?v=2026080101)
![Munchies Jukebox Afro House Mainstage Vol.1 [WAV, MiDi, Synth Presets]](/images/posts/munchies-jukebox-afro-house-mainstage-vol1-83641.avif?v=2026080101)
Muestras / Parches / MIDI
Munchies Jukebox Afro House Mainstage Vol.1 [WAV, MiDi, Synth Presets]
![Relooped RIOT Opium Trap Collection [WAV, MiDi, Synth Presets]](/images/posts/relooped-riot-opium-trap-collection-86059.avif?v=2026080101)
Muestras / Parches / MIDI
Relooped RIOT Opium Trap Collection [WAV, MiDi, Synth Presets]
![lovepluto 3K Murakami Kit (Only Serum Bank) [Synth Presets]](/images/posts/lovepluto-3k-murakami-kit-only-serum-bank-86057.avif?v=2026080101)
![Blancnote Artikko Sync.Biosis Granularia Vol.1 [WAV, Synth Presets, MiDi]](/images/posts/blancnote-artikko-syncbiosis-granularia-vol1-86052.avif?v=2026080101)
Muestras / Parches / MIDI
Blancnote Artikko Sync.Biosis Granularia Vol.1 [WAV, Synth Presets, MiDi]
![SINEE Hard Techno Rhythms [WAV, Synth Presets]](/images/posts/sinee-hard-techno-rhythms-83660.avif?v=2026080101)
Muestras / Parches
Top 5 %SINEE Hard Techno Rhythms [WAV, Synth Presets]
Preguntas frecuentes
- How do you design presets in Serum?
- Load Init, design a static tone with OSC A (wavetable + WT Pos + warp), shape it with the main filter and Env 1, add Env/LFO modulation, finish in the FX rack, map macros, then Save Preset As into
Presets/Userwith a role-based name[4]. - What does WT Pos do when designing Serum patches?
- WT Pos (wavetable position) selects which frame of the loaded wavetable you hear. Moving or modulating it morphs timbre without changing the root pitch — the core motion control of classic Serum sound design[5].
- Should I design from Init or from factory presets?
- Use factory or free packs to learn, but design saleable banks from Init so every routing is intentional. Hybrid approach: reverse-engineer, then rebuild from Init[4].
- Where do my new Serum presets save?
- User saves typically land under the Serum Presets tree in
Presets/User(exact OS path varies). Confirm with Menu → Show Serum Presets Folder; after adding folders or third-party packs, run Menu → Rescan folders on disk[3][1]. - How many macros should a Serum preset expose?
- Two to four meaningful macros is enough for most bank users: brightness, movement, space, and drive/width. Document them mentally so Macro 1 means the same job across your bank.
- Is Serum 2 the same workflow as Serum 1 for preset design?
- The Init → oscillators → filter → mod → FX → save loop is the same. Serum 2 adds more oscillator types and routing power; treat Serum 2 banks as their own product line when packaging[2].
- Where can I get free Serum presets to study?
- Start with curated free lists such as best free Serum presets on Plugg Supply, install via the official folder + Rescan workflow, then rebuild favorites from Init instead of only browsing[3].