
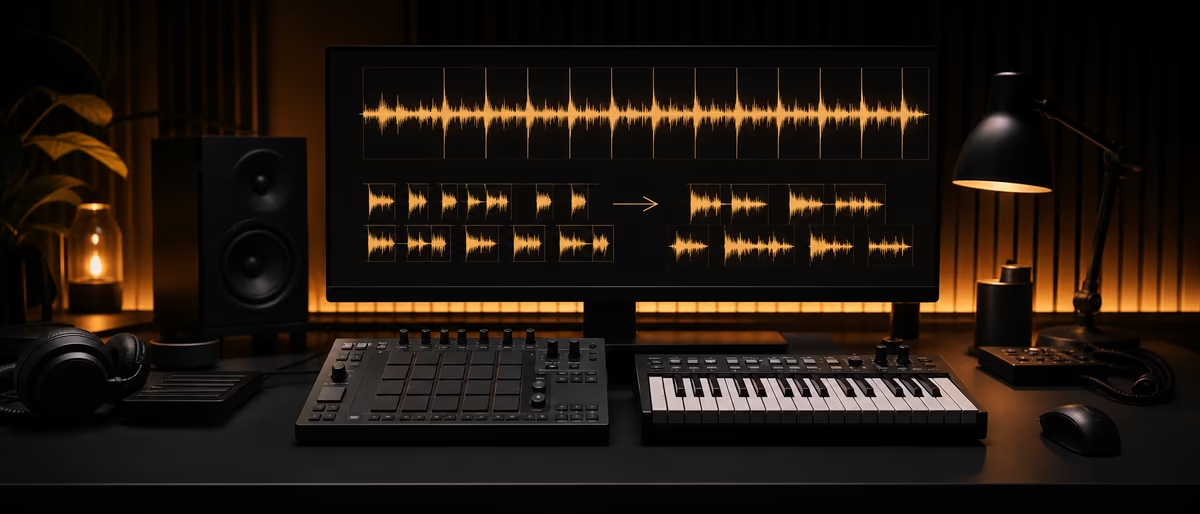
Sample chopping
Respuesta rápida
To chop samples, place cuts on transients (attacks), map each slice to a MIDI note, then rearrange timing and pitch. In FL Studio use Fruity Slicer or Slicex; in Ableton use Simpler Slice mode or Slice to New MIDI Track. Prefer royalty-free source material for commercial releases.
What Chopping Is For (Goals)
Chopping is not “delete silence.” It is a performance and arrangement tool: you break a continuous recording into playable hits so you can rebuild groove, harmony, and texture. Classic hip-hop, trap flips, drill, house edits, and modern vocal production all depend on this skill.
Clear goals before you open a slicer. You might want a new drum pattern from an old break, a melodic phrase reordered against a different grid, stuttered vocal hooks, or one-shot hits exported into a drum rack. If the goal is only to match project tempo without reordering, warping or time-stretch on a single clip is often enough — save full chops for when you need new order and accents.
- New groove Keep the sample’s tone, change hit order and spacing so the pattern fits your kick/snare.
- Melodic flip Isolate chord stabs or riffs, re-pitch slices, and program a different progression.
- Vocal hooks Cut syllables and breaths into playable pads; reverse or stutter for ear candy. Pair with vocal chop techniques when the source is sung phrases.
- One-shot library Export clean hits (kicks, snares, foley) into a kit for reuse across projects.
Transient-Based Cuts: Where to Place the Knife
A transient is the sudden attack at the start of a hit — the click of a snare, the consonant of a vocal, the pick attack on a guitar. Auto-slicers listen for those energy jumps; you should train your ear to the same landmarks. Cutting mid-sustain or mid-vowel creates mush and clicks unless you deliberately want a textural scrape.
Prefer cuts just before the attack peaks, ideally near a zero-crossing so the waveform does not jump from a non-zero sample value when playback starts. Both FL Studio’s Fruity Slicer and Ableton’s Simpler expose ways to snap or refine markers after automatic detection[1][2].
For dense material (full mixes, busy percussion), start with fewer slices — only the hits you will actually play. For sparse breaks or single-instrument loops, more slices give finer rearranges. Always audition each marker: false positives on room noise or cymbal wash waste MIDI pads and muddy programming.
- Listen once without looking
Mark strong accents mentally (kick, snare, chord change, lyric syllable) before trusting auto-slice density. - Run auto-slice at a medium threshold
Too sharp creates micro-slices of noise; too dull glues two hits into one pad. - Nudge bad markers
Move late cuts earlier so the attack is inside the slice, not hanging on the previous pad. - Kill useless markers
Delete slices that only capture reverb tails or silence — map playable hits only. - Apply short fades or declick
If you hear ticks on loop or retrigger, use the tool’s declick/fade options before rewriting arrangement.
FL Studio Concepts: Fruity Slicer and Slicex
Image-Line ships dedicated slicers that turn a wave into MIDI-playable regions. Fruity Slicer uses beat detection to divide a file into pieces you can play from the Piano roll or a controller; if the wave already carries slice/region data (for example some REX-style files), that data is preferred over detection[1].
Slicex (Producer Edition and higher) is the heavier instrument: advanced beat detection, two decks (A/B), a full wave editor (Edison-class tools), articulation (filters, envelopes, LFOs), layering of regions onto keys, and stretch workflows aimed at drum loops — though Image-Line notes it works on melodic parts, vocals, guitars, and full songs too[3].
Think of Fruity Slicer as the fast path for dumping a sliced pattern to the Piano roll and rearranging. Think of Slicex when you need per-region sound design, dual-source layering, or serious cleanup of imperfect markers. Neither workflow requires inventing menu paths from memory: load the sample into the slicer channel, let auto-slice run, refine markers, then sequence notes.
Practical Fruity Slicer concepts
After load, choose a slice method: built-in markers if present; Dull / Medium / Sharp auto-slicing for rough/normal/fine transient density; fixed beat divisions (for grid chops regardless of content); or no slicing for one big pad[1]. Auto Low / Auto High thresholds retune how aggressive detection is. Use zero-cross checking if pops appear between slices.
Dump the beat to the Piano roll with presets such as normal order, reverse sequence, random placement that keeps groove length, quantize/swing, stutter half/quarter, and pitch or pan variants[1]. That dump is your rearrange canvas — edit notes like any drum pattern. Pitch shift (PS) and time stretch (TS) sliders affect all slices; pick a stretch method that matches material (transient-preserving for drums, monophonic/formant-aware options for vocals).
Practical Slicex concepts
Load by dragging from the Browser onto the plugin, clicking the empty wave editor, or the file control. Slicex auto-slices on load (deck A by default unless you target deck B). You can append samples with Shift-drag or replace by dropping onto a slice marker name[3].
When gaps or clicks show between regions, move marker tabs manually, then try region tools such as Declick out all regions (smooths decays, keeps attacks — often better for drums) or Perfect all regions. Destructive Drum(loop) stretch is available globally or per-slice when hits are already too short for further declick fades[3]. Assign regions to trigger notes for layered pads, then sequence from the Piano roll like a sampler instrument.
Ableton Concepts: Simpler Slice Mode and Slice to MIDI
Ableton Live’s built-in path splits into two complementary ideas. Simpler can hold one sample and switch among Classic, One-Shot, and Slicing playback modes. In Slicing mode the sample is non-destructively divided so each slice plays chromatically — ideal for rhythmic breaks[2].
Slice to New MIDI Track (Create menu / clip context menu on an audio clip) is different: it splits audio into chunks mapped to MIDI notes, builds a new MIDI track, and loads each slice into a Simpler inside a Drum Rack chain so you can resequence and process hits independently[4]. Use Simpler Slice when you want one instrument and fast pad play; use Slice to MIDI when you want rack-style per-slice effects and drum-pad workflows.
Simpler — Slice By and playback
In Slicing Playback Mode, the left/right flags set the playable region. Slice By chooses Transient (auto on attacks; Sensitivity raises slice count up to 64), Beat (musical divisions), Region (even time splits), or Manual (double-click only)[2]. Drag auto markers; double-click to delete or insert manual (white) markers. Playback can be Mono, Poly, or Thru (monophonic, but continues through the rest of the region after the hit). Trigger/Gate and fade in/out shape how long slices ring — same family of controls as One-Shot mode.
Slice to New MIDI Track — dialog choices that matter
The slicing dialog offers beat resolutions or slicing by the clip’s transients or Warp Markers, plus a slicing preset chooser. Live caps racks at 128 chains — if your resolution would exceed that, lower density or select a smaller clip region first[4]. “Preserve warped timing” keeps warp-based timing changes in the slices; disable it to hear raw original timing.
After OK, you get a chromatic “staircase” of MIDI notes and one Simpler chain per slice. Edit the MIDI clip to resequence; swap pad note mappings by dragging Drum Rack pads; multi-select chains and group them to share effects; put MIDI effects (Arpeggiator, Random) before the rack for generative patterns[4]. Ableton’s own manual encourages slicing voices and textures, not only drum loops.
FL Studio vs Ableton: Chop Workflow Comparison
Both DAWs solve the same problem — playable slices + rearrange — with different default metaphors. FL leans on dedicated slicer instruments and Piano roll dumps. Live leans on Simpler modes and Drum Rack chains. Use the table as a routing map, not a ranking.
| Need | FL Studio path | Ableton Live path | Notes |
|---|---|---|---|
| Auto-slice on load | Fruity Slicer / Slicex load + auto markers | Simpler Slice By → Transient | Always refine false hits |
| Fixed grid chops | Beat-division slice methods in Fruity Slicer | Slice By → Beat or Region | Grid chops ignore musical content |
| Dump full pattern to MIDI | Dump beat to Piano roll presets | Slice to New MIDI Track staircase clip | Edit notes = new groove |
| Per-slice FX | Slicex articulation / separate bounced one-shots | Each Drum Rack chain after Slice to MIDI | Live rack is explicit per slice |
| Dual source / layers | Slicex decks A/B + trigger note layering | Multiple Simplers or nested racks | Slicex designed for dual decks |
| Stretch whole loop feel | Fruity Slicer TS + stretch methods; Slicex drum stretch tools | Warp modes on clip / Simpler warp | Match algorithm to drums vs vocals |
Rearranging Chops Into Music
Once slices map to notes, stop thinking like an audio editor and start thinking like a drum programmer. Leave the original order for one bar as a reference, then write a new pattern: move the snare slice to a different backbeat, double the open-hat slice as 16ths, mute the busiest mid-bar hits for space. Hip-hop chopping tradition is exactly this — the sample becomes a kit.
Useful rearrange moves: reverse the sequence while keeping each slice playing forward; stutter the last 1/8 of a bar by repeating a short slice; swap the first and third bar hits for a call-and-response; leave rest on downbeats so a real kick can own the low end. Fruity Slicer’s dump presets (reverse, random with groove length preserved, stutter, swing) exist to jump-start those ideas[1]; in Live, hand-edit the staircase MIDI or re-pad the Drum Rack[4].
For melodic material, program chord hits on the root rhythm of your track, not the source’s original barline. Layer a sub or 808 under pitched chops so the sample does not have to carry bass. When CPU or phase issues appear, bounce the rearranged MIDI performance to a single audio clip and treat it as a new loop — related to resampling techniques.
- Drums Keep the greasiest transient slices; mute weak ghost notes; align kicks with your own kick sample rather than fighting low end.
- Vocals Chop on consonants; avoid cutting mid-vowel unless the glitch is intentional; leave air for the next syllable.
- Melodic loops One chord per pad; re-order into a progression that fits your key; high-pass muddy low mids after rearrange.
- Textures Longer slices, overlapping Poly/Thru playback, heavy reverse and filter automation — less groove, more bed.
Time-Stretch and Pitch Notes (Without Killing the Slice)
Chopping and stretching interact. If you re-pitch a drum slice with simple resampling, length shortens when pitch rises — classic MPC character. If you time-stretch while holding pitch, algorithms matter: transient modes protect kick/snare attacks; tonal/monophonic modes suit sustained notes and vocals[1].
In Ableton, warping on the source clip before Slice to MIDI (and the “Preserve warped timing” option) decides whether sliced MIDI inherits your warped feel or the raw file timing[4]. Simpler also exposes warp controls across playback modes for tempo-locked phrase work[2].
Practical rules: stretch drums only as far as the attack still reads as a hit; formant-preserve or monophonic-stretch vocals before extreme pitch moves; after heavy stretch, re-check zero-cross and declick because new artifacts appear at new loop points. For intentional lo-fi, a small amount of chipmunk or slowdown character is fine — just commit early so arrangement decisions match the new timbre.
Pitch first (sample-rate style)
Raise/lower pitch and accept length change. Fast, musical for hip-hop chops and 808s. Avoid on long tonal pads if you need locked bar length.
Best for: drums, short stabs, throwback flips
Time-stretch, hold pitch
Match project BPM without changing root pitch. Use transient-preserving modes on percussion; monophonic/speech-aware modes on vocals.
Best for: loops that must stay in key and on grid
Warp then slice (Live)
Correct timing on the audio clip, then Slice to MIDI so the new Drum Rack inherits the musical grid you already fixed.
Best for: off-grid recordings and tempo maps
Legal Reminder: Sampling Is Not Automatically Free
Technique does not equal clearance. Under U.S. copyright practice, sampling often implicates both the sound recording and the underlying musical work. Unauthorized samples, remixes, and mashups can infringe exclusive rights unless the use is licensed or qualifies for an exception such as fair use — which is fact-specific, not a fixed “two-second rule”[5][6].
The U.S. Copyright Office states there is no bright-line number of notes or seconds you may take without permission; when in doubt, obtain permission[6]. Commercial beat sales, streaming releases, and Content ID claims make unlicensed chops especially risky.
Safer creative path for day-to-day production: chop royalty-free / properly licensed packs, your own recordings, or cleared stems. Read each pack’s license (redistribution, commercial use, Content ID). Deeper reading: royalty-free samples, sample clearance, and music copyright law. For legal-basics framing of sampling for beats, see how to sample legally for beats.
A One-Session Practice Workflow + Free Source Material
- Pick one 4–8 bar loop
Drums first if you are new; vocals second. Avoid full commercial songs until you understand clearance. - Chop on transients only
Medium auto-slice, delete weak markers, fix late attacks. Goal: 8–16 playable pads, not 64 noise crumbs. - Dump or Slice to MIDI
FL: dump to Piano roll. Ableton: Slice to New MIDI Track or sequence Simpler Slice notes. - Write an 8-bar rearrange
Keep tone, change order. Leave space for your own kick/808. Mute half the mid-bar clutter. - Pitch two accents
Raise one melodic or snare slice a semitone for variation; stretch only if the groove slips the grid. - Bounce and name
Render the rearrange as audio, namechop_rearrange_v1.wav, and archive markers/MIDI in the project.
Need raw WAVs without digging random torrents? Browse free verified loops, one-shots, and drum material under /libraries/samples — then practice the same chop workflow on material you are licensed to release. Pair with samples vs loops vs one-shots and sample organization so your chops stay findable next month.
If your chops are mostly sung phrases, continue with the dedicated vocal chop tutorial. If you bounce chops into new textures and re-record them through FX, layer that with resampling techniques for a full sample-flip pipeline.
Grab free royalty-friendly sample packs and one-shots, then practice your next chop session on cleared material.
Learning path
Answer hubs relacionados
Materiales del catálogo
Materiales de producción para probar después
Packs, stems y recursos de sonido relevantes del catálogo para pasar de la guía a la producción de inmediato.
![Harvy Valencia Sample Pack Vol.1 [WAV]](/images/posts/harvy-valencia-sample-pack-vol1-83780.avif?v=2026080101)
![Undergroundtekno Mat Weasel Vs Dr Looney Sample Pack [WAV]](/images/posts/undergroundtekno-mat-weasel-vs-dr-looney-sample-pack-85756.avif?v=2026080101)
![Sample Candy 001 Sweely Mega Pack [WAV]](/images/posts/sample-candy-001-sweely-mega-pack-83779.avif?v=2026080101)
![Emp.K Atmos Sample Pack Vol.2 [WAV, MiDi, Synth Presets, DAW Templates]](/images/posts/empk-atmos-sample-pack-vol2-85893.avif?v=2026080101)
Muestras / Parches / MIDI / PROJECTS,TEMPLATES
Emp.K Atmos Sample Pack Vol.2 [WAV, MiDi, Synth Presets, DAW Templates]
Ruta de aprendizaje
Tutoriales y materiales de aprendizaje
Tutoriales paso a paso y recursos de aprendizaje para quien quiera un camino práctico más profundo tras el artículo.
![Drumworkout Bill Bachman's Chop Builders [TUTORiAL]](/images/posts/drumworkout-bill-bachmans-chop-builders-85723.avif?v=2026080101)
LEARNING / VIDEO TUTORIALS
Drumworkout Bill Bachman's Chop Builders [TUTORiAL]
![On Point Samples The Industrial Rawstyle Kick System [WAV, Synth Presets, TUTORiAL, DAW Templates]](/images/posts/on-point-samples-the-industrial-rawstyle-kick-system-84280.avif?v=2026080101)
Muestras / Parches / PROJECTS,TEMPLATES / VIDEO TUTORIALS
On Point Samples The Industrial Rawstyle Kick System [WAV, Synth Presets, TUTORiAL, DAW Templates]
![Chambers Courses Sampling [TUTORiAL]](/images/posts/chambers-courses-sampling-82521.avif?v=2026080101)
LEARNING / VIDEO TUTORIALS
Chambers Courses Sampling [TUTORiAL]
![SamplesByMULAK The MULAK RnB Vault [WAV, MiDi, TUTORiAL]](/images/posts/samplesbymulak-the-mulak-rnb-vault-79792.avif?v=2026080101)
Muestras / MIDI / VIDEO TUTORIALS
SamplesByMULAK The MULAK RnB Vault [WAV, MiDi, TUTORiAL]
Preguntas frecuentes
- How do you chop samples in FL Studio and Ableton?
- Cut the audio on transients, map slices to MIDI notes, then rearrange. In FL Studio use Fruity Slicer or Slicex and dump to the Piano roll; in Ableton use Simpler’s Slicing mode or Slice to New MIDI Track into a Drum Rack.[3][4]
- What is the difference between Fruity Slicer and Slicex?
- Fruity Slicer is the lighter beat-detection slicer with Piano roll dump presets and global pitch/stretch. Slicex (Producer Edition+) adds dual decks, deeper editing, articulation, layering, and advanced region tools for cleanup and sound design.[1][3]
- When should I use Ableton Simpler Slice mode vs Slice to New MIDI Track?
- Use Simpler Slicing mode for one sample instrument with chromatic pads and Mono/Poly/Thru playback. Use Slice to New MIDI Track when you want each slice in its own Drum Rack chain for independent effects and pad swapping.[2][4]
- Should I chop on the grid or on transients?
- Transients first for musical hits (drums, syllables). Use fixed beat/region divisions when you want even stutter chops regardless of content. Hybrid is normal: auto-transient, then nudge onto a musical grid.
- How do I stop clicks between sample chops?
- Move markers to zero-crossings, apply short fade in/out or the slicer’s declick tools, and avoid cutting mid-waveform. Fruity Slicer has zero-cross check and DeClick; Slicex offers declick/perfect region tools; Simpler has Snap and fade controls.[1][2]
- Is it legal to chop any song for a beat?
- Not automatically. Sampling can require permission for the recording and composition; fair use is case-by-case with no fixed free duration. Prefer licensed royalty-free packs or clear samples before commercial release.[6][5]
- Can I chop vocals the same way as drums?
- Same tools, different cut points: slice on consonants and phrase starts, use monophonic/formant-friendly stretch for pitch changes, and leave space between syllables. Dedicated vocal-chop sound design is covered in the vocal chop tutorial.